If you’ve ever worked in the PET thermal lamination industry, you know that consistent, high-quality output doesn’t just come from top-tier materials like our PET thermal lamination film—it comes from regular, intentional equipment maintenance. Over the past eight years as a PET thermal lamination film supplier, I’ve fielded dozens of calls from frustrated customers saying their laminators are leaving spots on finished prints, sticking lamination film to rollers, or even causing the film to delaminate mid-process. 9 times out of 10, the root issue isn’t a broken machine—it’s a dirty laminator. Cleaning your equipment the right way isn’t just about fixing a problem; it’s about extending the life of your machine, cutting down on material waste, and keeping your PET film performing as it was designed to. Today, I’m breaking down a step-by-step cleaning process tailored specifically to PET thermal lamination equipment, along with the common mistakes I see every day that turn a simple clean into a costly headache. PET Thermal Lamination Film
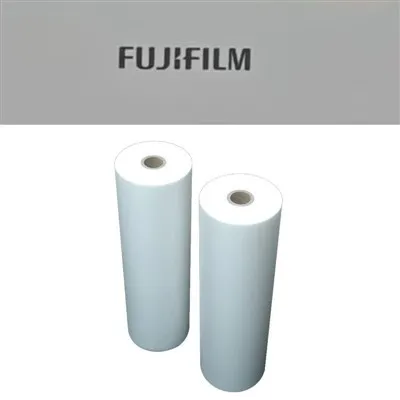
First, let’s talk about why PET lamination equipment needs a specific cleaning routine, not just a generic one. PET thermal lamination film is made with a thin, heat-activated adhesive layer that melts when exposed to the laminator’s hot rollers, presses through the machine, and bonds to your substrate. Over time, any excess adhesive that doesn’t fully transfer to the print will build up on rollers, pressure bars, and even the heat shields. Unlike PVC or BOPP lamination materials, PET’s adhesive is more resistant to gentle cleaning methods—skip the right supplies, and you’ll end up with baked-on gunk that’s impossible to remove without harsh chemicals that can scratch roller surfaces or even react with your next batch of PET film, leading to adhesion issues. I recommend setting a cleaning schedule that lines up with your production volume: if you run short runs of 100 or fewer items daily, a deep clean every two weeks works. If you run 500+ feet of PET film a day, do a quick, targeted clean at the end of every shift and a full deep clean once a week.
Before we jump into the actual steps, let’s cover the safety and supply prep—this is non-negotiable, and I’ve seen too many people skip it to their own detriment. First, turn off the laminator and unplug it from the wall. Even if you think the machine is cool, the hot rollers can retain heat for 30 minutes or more after use, so wait at least an hour before touching any internal parts. Next, gather supplies that are safe for PET lamination equipment and won’t damage your film or machine: a lint-free microfiber cloth (paper towels leave tiny fibers that get stuck on rollers and transfer to your lamination), a plastic scraper (never use metal—metal will scratch the smooth chrome or silicon rollers that are standard on most PET laminators), isopropyl alcohol with a 90%+ concentration (70% is too mild for baked adhesive), distilled water (tap water has minerals that can leave residue), and a gentle, pH-neutral dish soap (avoid anything with bleach or ammonia, which can break down PET film over time). If you’ve had a recent issue with adhesive build-up, you can also grab a small bottle of food-grade silicone lubricant—just make sure it’s water-based, not solvent-based, as solvent-based lubricants can leave a film that prevents proper PET adhesion.
Now, let’s walk through the step-by-step cleaning process, starting with the quick daily clean that takes 10 minutes or less. I tell all my new customers that this small routine alone cuts deep cleans needed by 50%. When your shift is done, don’t just shut off the machine—leave your laminator on its lowest heat setting (usually 150°F for most PET films) and run a 6-inch strip of unprinted PET lamination film through the full length of the machine. This low-heat pass will melt and loosen any surface adhesive build-up, and the blank film will absorb most of it as it exits the other end. It’s like a self-cleaning pass that uses your own product to do the hard work. Once you’ve run that blank strip, unplug the machine, wait 10 minutes for rollers to cool slightly, then take your lint-free cloth dampened with a mix of 1 part isopropyl alcohol and 4 parts distilled water, and gently wipe down the visible parts of the rollers, pressure bar, and the feed slot. Skip the center of the rollers for the daily clean—save that for the deep clean, since the edges collect most of the build-up from the film’s edges. This quick step is perfect for small jobs that only use a few feet of PET film a day, but if you’re running high volumes, you’ll need to do a full deep clean.
The weekly deep clean is where you’ll tackle the stubborn build-up that the daily pass misses. Start by disconnecting the laminator from power and letting it cool completely—about 45 minutes to an hour, depending on the machine. Next, remove any excess parts that are easy to take off: the film feed tray, the output catch tray, and the pressure bar cover (check your machine’s manual for specific instructions, but most of these just snap or slide off, no tools needed). Set these parts aside in a bucket of warm, soapy water mixed with a drop of pH-neutral dish soap—don’t use harsh chemicals here, as plastic parts can absorb residue that will transfer to PET film later. Now, turn your attention to the rollers. For this step, you’ll use the plastic scraper to gently lift any thick, baked adhesive build-up off the top and bottom of each roller. Hold the scraper at a 45-degree angle to the roller, and apply light, even pressure—if you push too hard, you’ll scratch the roller, which will ruin the smooth surface needed for even PET lamination. Go slow, working along the length of the roller, until all the visible thick gunk is lifted. Next, dampen a clean microfiber cloth with undiluted 90%+ isopropyl alcohol, and wipe each roller thoroughly, working in the direction of the roller’s axis (not around it) to avoid leaving streaks or spreading adhesive. Pay extra attention to the edges of the rollers, where the PET film’s edge makes contact—this is where build-up accumulates the fastest. For any stubborn spots that won’t come off with alcohol, you can lightly dip a corner of your cloth in the food-grade silicone lubricant, rub the spot gently, then wipe it clean with a fresh cloth and alcohol. Once both rollers are completely clear, take your pre-soaked plastic parts out of the soapy water, scrub them gently with a soft brush (a toothbrush works great for tight spots), rinse them with distilled water, and dry them completely with a lint-free cloth before putting them back. Now, wipe down the interior of the laminator—around the heat shields, the film guides, and the frame—using the same alcohol-water mix. Don’t forget to wipe the feed slot, as small pieces of leftover PET film can get stuck there and cause jams during your next run. Once everything is reassembled, run two blank strips of PET lamination film through the machine on a low heat setting to absorb any leftover cleaning residue. This is a crucial step—if you skip it, that leftover residue will transfer to your actual product, leading to weak adhesion or spots on your lamination.
Now, let’s talk about the common mistakes I see customers make that make their equipment dirtier, not cleaner. The first big one is using paper towels or rags instead of microfiber. Paper towels leave tiny cellulose fibers that stick to rollers, and when you run PET film through the machine, those fibers get trapped between the film and the substrate, leading to visible flaws. Rags, on the other hand, can have hidden dirt or lint that you can’t see, which gets transferred right back to clean rollers. The second mistake is using too much alcohol, or alcohol with a high concentration (like 99%). While 90%+ is best for adhesive build-up, undiluted 99% is too harsh and can break down the rubber seals on pressure bars, leading to uneven pressure on the PET film. Another mistake is cleaning the rollers when they’re still hot—heat actually melts adhesive into the roller’s surface, making it harder to remove later, rather than loosening it. I see this all the time: someone shuts off the machine, waits 10 minutes, then tries to clean hot rollers, and ends up with a mess that takes twice as long to fix. Finally, many people forget to clean the film guides and heat shields, which are often overlooked but can transfer dust or residue to your PET film as it passes through. Even a tiny speck of dust on a heat shield can leave a permanent mark on a long run of lamination, so don’t skip those parts.
Wait, one question I get all the time: can you clean the rollers while the machine is warm, not hot? The short answer is yes, if you’re doing a quick daily clean and using low heat. If you run the laminator at 120°F (just warm to the touch) before the daily pass, the adhesive will loosen just enough to lift off with the blank PET film strip, and you can wipe the rollers without burning yourself. But never attempt to clean a hot roller that’s over 150°F—this is where the damage happens. Another pro tip from my team: if you notice that your PET film is starting to stick to the output roller, run a small amount of talcum powder (food-grade, not cosmetic) through the machine on a low heat setting once a month, then do a quick wipe down. This creates a thin barrier that prevents adhesive build-up, without interfering with the PET film’s adhesion later. Just make sure to wipe all excess talcum powder out of the machine after use, as leftover powder can cause jams.
Now, why does all this matter for your PET lamination projects? When your equipment is clean, the PET thermal lamination film adheres evenly across the entire substrate, no weak spots, no peeling edges, no spots that ruin a print run. I’ve had a customer come to me last year who was throwing away $2,000 worth of PET film every month because their laminator was leaving streaks. We walked through their cleaning process together, and they were doing a deep clean once every 3 months with generic all-purpose cleaner and paper towels. After implementing the daily quick clean and weekly deep clean I outlined, their waste dropped by 80% in the first month, and their customer satisfaction scores went up because their lamination was consistently high-quality. That’s the real payoff: proper cleaning doesn’t just save you time on maintenance—it saves you money on wasted materials and keeps your business running smoothly.
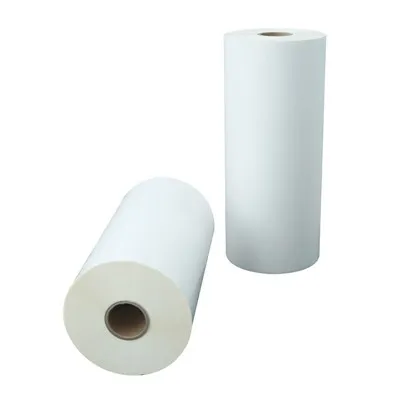
If you’re struggling with equipment build-up, or you’re not sure if your current cleaning routine is working, feel free to reach out to our team for personalized tips. We’ve worked with thousands of lamination operators, from small print shops to large packaging facilities, and we know exactly how to troubleshoot common issues that come with PET thermal lamination film. Whether you need help adjusting your cleaning schedule, choosing the right supplies for your specific machine, or just want to ask a quick question about maintaining your equipment, our team is here to help. Don’t let dirty equipment ruin your PET lamination results—let’s work together to keep your machine running at its best.
Thermal Laminating Film References
Thermal Lamination Equipment Maintenance Guidelines. Printing Industries of America, 2022.
PET Film Adhesion and Care in Lamination Processes. Journal of Printing Science and Technology, Vol. 64, No. 3, 2021, pp. 145-152.
Recommended Cleaning Practices for Industrial Laminators. National Association of Printing Equipment Manufacturers, 2020.
Yantai Hongqing Packing Material Co., Ltd.
Yantai Hongqing Packing Material Co., Ltd. is one of the most professional pet thermal lamination film manufacturers and suppliers in China, also supports customized service. Welcome to wholesale advanced pet thermal lamination film made in China here and get quotation from our factory. Quality products and reasonable price are available.
Address: Eastern Industrial Park, Taocun, Yantai, Shandong Province, China
E-mail: cindy@ythongguang.cn
WebSite: https://www.hqingnewmat.com/
